Dual Boot Windows 11 and macOS
If you want to run Windows OS and macOS on your MacBook or Mac then this is going to help you. You are going to use the most simple and easy way to perform the operation. After completing the operation, you will be able to boot between the macOS and Windows OS. So, without further wasting any more time, here is how to dual boot Windows 11 and macOS.
Here are some of the dual-booting methods that we have tried that you might be interested in:
- How to dual boot Fedora with macOS Catalina?
- Dual Boot Windows 11 and Windows 7
- How to Dual Boot macOS Big Sur and Windows 10 on PC?
- How to Dual Boot Ubuntu & Windows 10?
- Install Windows 10 on macOS Big Sur using Boot Camp
- How to Dual Boot Two macOS on Mac?
Pre-requisites for Dual booting Windows 11 with macOS
You will need to take care of a few things before dual booting the OS and macOS.
- Make sure that your Mac or MacBook completes the system requirement of Windows 11. Your Mac should have at least 4 GB RAM memory, 100 GB of free storage for Windows 11, processor equivalent of Core i5 or better.
- One of the most important section in Windows 11 system requirement is the secure boot and TPM features. If you don’t have the feature then you can bypass the TPM phase using the method at the bottom of the page.
- Any macOS should be installed on your Mac or MacBook. Try to use macOS Big Sur or macOS Monterey, as they are the latest versions of macOS.
- You will also need to download Windows 11 ISO file. This ISO file will be used for the installation later.
Dual Boot Windows 11 and macOS

There are different ways to use Windows OS on macOS. You can use third-party applications such as VMware Workstation or Virtual Box to create a virtual machine and use the OS. However; most of the users prefer dual booting instead of virtualization, so here is how to do it.
1: Create a Partition for Windows 11
First, you are going to create a partition on your disk for your Windows 11. If you are using an SSD with storage below 100 GB then you are recommended to install a disk with a bigger storage size.
Now create a separate partition of at least 100 GB for your Windows 11. Make sure that your new disk is GPT and not MBR. Earlier versions of macOS used MBR which is not only supported anymore by the latest versions of macOS and Windows OS too.
2: Download Mac Boot Camp Assistant
Now you are going to download Mac Boot Camp Assistant from Apple Store. The application will help you to install Windows 11 in the next step.
3: Use Windows 11 ISO in Boot Camp Assistant
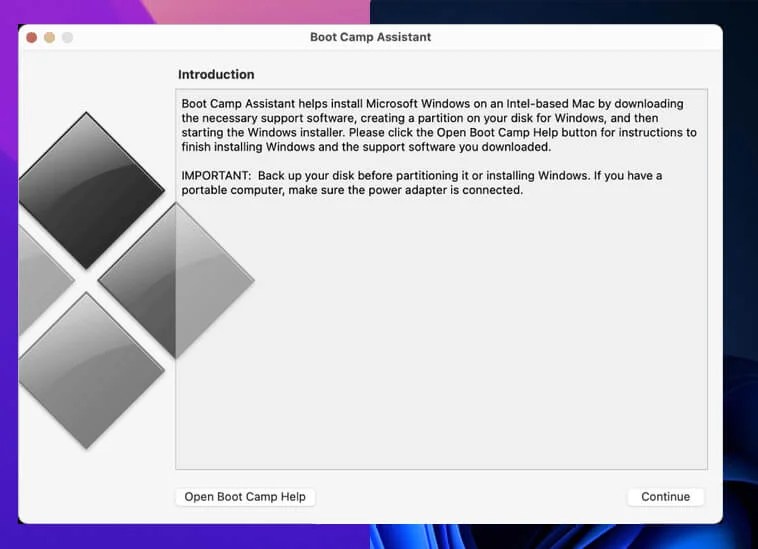
Here you are going to select that downloaded Windows 11 ISO file that we mentioned at the start. Then you will start the installation by opening the Utilities. There you will select the Boot Camp Assistant and will run it.
A new window will appear on your screen, click on Continue. Here you will be asked to backup up Mac and all the data; you can use the option and do the backup or can continue to the next step.
NOTE: Make a backup of your files before continuing to the next step, as you might lose your data while performing the operation.
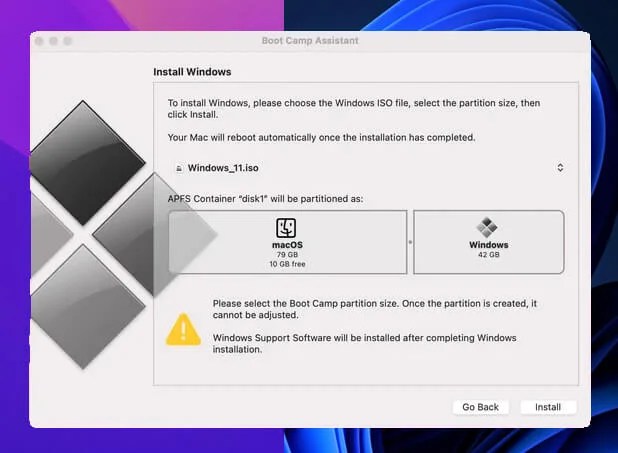
Then you will locate the Windows 11 ISO and will select the drives one of the two that you have created earlier. Select the drive that you have created for Windows OS and click on Install.
You will be asked for the password and the system will restart.
4: Install Windows 11 on Mac
After restarting the Mac, you will be placed in the Windows installation phase. From here on, you are going to install Windows 11 like any other Windows OS.
NOTE: it is suggested to disconnect any internet connection for improved performance and to complete the procedure faster.
- In Windows Setup, you will continue to next step.
- Then you will select the Language, Time & Format and Input method; click on Continue.
- You will be asked “Which type of installation you want?” click on Custom: Install Windows Only (advanced) option.
- Soon you will be asked for Product key, click on I don’t have a product key and continue to next step.
- Select the Windows 11 Edition and start the installation.
Windows 11 installation will take place. Once the installation got completed, your system will restart again.
5: Boot the Windows 11 on Mac
While your system starts, you will hold the OPTION key. You will be placed between two disks; you will select the disk with Windows 11 and the system will boot Windows 11. In the future, if you wanted to boot between Windows 11 or macOS then you can use the same method.
6: Personalize the Windows 11
On booting Windows 11, you are going in different phases to personalize Windows 11. There will be many phases, from creating a user account to selecting the keyboard and location. Since all the steps are easy, I have left that to you and I know you can easily do the personalizing of Windows 11.
7: TPM Error during dual boot Windows 11 and macOS
As we promised at the beginning, those users who don’t have the TPM feature on their Mac or MacBook, then they use this method to bypass the TPM phase.
Most users who are installing Windows 11 on Mac (without TPM) will experience the “This PC can’t run Windows 11” error. To bypass the error, you will press the SHIFT+F10 keys to enter the CMD.
Inside the CMD, you will type “Regedit” and press on ENTER to open the Registry Editor.
Navigate and find Computer\HKEY_LOCAL_MACHINE\SYSTEM\Setup inside the Registry Editor. Once you have found the folder, then you will open it and there you are going to create a few new keys.
Right-click on Setup Folder and go to New > Key. Now you will rename the key into LabConfig.
Again, you are going to create three new DWord by right-clicking on the screen, selecting New > DWord (32-bit) Value. Change their names to the following:
- Bypass TPM Check
- Bypass Secure Boot Check
- Bypass RAM Check
NOTE: make sure all the three DWord values are changed to 1. In Registry, all the keys are either 0 or 1 in value. You will need to change the three newly created DWord to 1.
Final Thoughts
Congratulation! You have successfully dual-boot Windows 11 and macOS on your Mac. Mostly you will experience the TPM error while installing, and I have provided the method to fix it. Still, you got any other questions or have experienced any error then comment down. I get to your answer as soon as possible. Users who don’t want to use the dual boot option anymore, can use the same method that we have used on “How to Remove Ubuntu Dual Boot from your System?” to remove the Windows 11 from dual booting.


