How to Install Windows 11 on VMware Workstation?
How to Install Windows 11 on VMware Workstation? Want to check out Windows 11? Windows 11 got some massive upgrade and has changed completely. From the user interface to, new features, high-end security, and much more. However; it is not a good idea to install Windows 11 on your system, as till now only the Preview has been released.
Some of the biggest changes that are brought (or was said in Build Conference). Still, users are waiting for the full version, until then you can install Windows 11 on VMware Workstation to check out the OS.
Requirements to run Windows 11
Before we continue, let’s make sure you have all the specs to run Windows 11. Since you are running as guest OS, you will need more juice as compared to installing it on your system.
You will need 8 GB of RAM memory with a Quad-Core processor or better. 4 GB of RAM will be used by guest OS and the other 4 by the host. The same will be applied to the processor.
For this purpose, you will need to download and install VMware Workstation. here we have used VMware Workstation Player, as it is free and can be configured within few steps. However, you can also use VMware Workstation Pro too. There is no specific need for which version of VMware, as long as it is a VMware app.
There is also a need for Windows 11 ISO file. This setup file will be used to install Windows 11 on your VMware Player.
Related: How to Create Windows 10 Bootable USB without Third-party apps?
The last thing will be Enabled virtualization from BIOS. A system with disabled Virtualization can’t run any guest OS, if somehow runs, the guest OS will lag and show poor performance.
Issue with TPM
While installing Windows 11 on any system or while check for Windows 11 system compatibility, users have seen TPM issues quite often. For running Windows 11, your system needs to possess TPM else can’t run Windows 11. So, can VMware run Windows 11?
Recently, VMware has updated its application and brought support for Windows 11 by providing emulated TPM support. The same update has been made in VirtualBox too. While installing Windows 11 on VirtualBox or VMware, you won’t experience any TPM error.
Note: if you got somehow a TPM error on your VMware, then you will need to update your VMware application or go to settings and enable the feature. These two reasons can contribute to TPM errors on VMware.
How to Install Windows 11 on VMware Player?

Since we have used VMware Player and like previous versions of Windows OS, almost the entire procedures are the same. So, we have tried to make it short while covering the important parts. Still, if you got any kind of problem during or after the installation then the comment section is all yours.
1- Create new VM (virtual machine)
The first thing will be to create a new VM for Windows 11. Run your VMware Player and click on File in the menu bar then select New Virtual Machine… option. Or you can use the shortcut key CTRL+N.
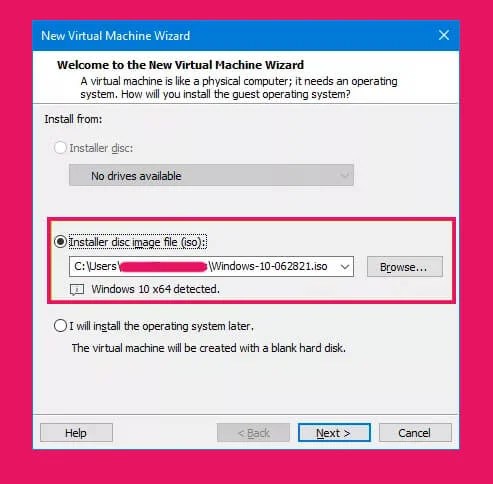
You will be placed in the Welcome to new Virtual Machine Wizard window. There you will get different options as:
- Install from:
- Installer disc image file (ISO):
- I will install the operating system later:
Select the Installer disc image file (ISO) and another window will prompt. There you will select the Windows 11 ISO file.
Once selected, click on the Next button.
2- Set guest OS

When are at the Select a Guest Operating System window, there you will find different options in the Guest Operating system section. Select Microsoft Windows then select Windows 10 x64 in the Version section and click on the Next button.
3- Name your virtual machine

Then you will name your virtual machine. Insert any name in the Virtual machine name and then select the location of your VM by clicking on Browse beside the Location. Just after you have named it and selected the location, click on the Next button.
4- Specify Storage of VM

Here you will need to specify the storage of your virtual machine. You are placed in Specify Disk Capacity window, insert the number of GB in “Maximum disk size (GB):” and select the first option in:
- Store virtual disk as single file
- Split virtual disk into multiple files
Now that you have selected the first option (Store virtual disk as a single file), click on the Next button.
Related: How to Install Windows on VMware Fusion on Mac?
5- Configure the virtual machine becoming running

Before you click on the Finish button, click on Customize Hardware… as there are some changes that need your attention.
6- Specify RAM and Processor

Select the Memory section on the left side and specify the RAM for the VM by inserting the value in Memory for this Virtual Machine. You can also move the slider up or down to increase or decrease the RAM memory.
Then click on the Processor section (on the left side) and select New CD/DVD (SATA) and click on Browse (it is beside the Use ISO Image file:) and select ISO Image of Windows 11 and click on Close.

Before you click on Finish, make sure have enabled Power on this virtual machine after creation.
7- Boot your Windows 11
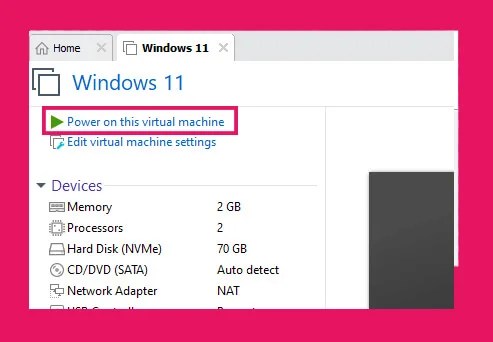
In this step, you will reboot your VM. Once VM starts, it will boot Windows 11 setup file. Here you will need to press any key to boot Windows 11 setup. If you don’t know how to restart your VM, then you can click on Restart in Power in the Menu bar at the top.
8- Windows 11 setup
For installation of Windows 11 on VMware, you will experience these steps one by one:
- Select Language and Region, Time and Currency and then Keyboard layout for your Windows.
- In Product key window, you will insert your product key or will click on I don’t have a product key.
- Then you will select the version of Windows 11 you are going to use.
- Accept the license of Windows 11.
- Chose the Custom option in Which type of installation do you want? window.
- You will be placed in disk partition section. Select disk for your Windows 11 installation and continue to next step.
- Installation will take a while.
9- Install windows 11
Here you have successfully installed Windows 11, now you will customize your Windows 11 in VMware.
- First you will select your Country and Region.
- Then you will select Keyboard layout and input option.
- After keyboard layout, option for second keyboard will appear, Skip it.
- Set up your Windows 11 for Personal use.
- Create an account, name it and insert a password for protection.
- Chose the Privacy settings and continue to next step.
- In Customize experience section, you will click on Skip.
10- Install Graphics of Windows 11 on VMware
The moment your Windows 11s installation got completed and you are running Windows 11, a small bar will appear at the bottom of your screen. You will click on Install Tools, then will Install the VMware Graphics drivers.
11- Install Tools on VMware
If somehow the bar didn’t appear, you will need to run it manually. Even if the graphics are installed, you will need to install the tools for improved performance.

Click on Run in the menu bar at the top, and select “Install VMware Tools…”. This will mount VMware tools on your VMware.

Now go to This PC and there you will find VMware Tools DVD. Open the DVD and inside you will find setup64. Double click on setup64.
You will be asked for Typical, Complete, or Custom options. Select the Typical option and click on Next. The installation will take place, once done click on Finish.
Soon, a prompt will appear, select Yes. Now your VM will restart and are ready to use Windows 11 on VMware Player.


